• Skip to main content
  • Skip to secondary menu
  • Skip to primary sidebar
  • Skip to footer
  • HOME
  • NEED SOMETHING REVIEWED?

Ordinary Reviews

Gaming And Entertainment Site

  • GAMING
    • GAME GUIDES
    • UPCOMING RELEASES
    • SIMILAR GAMES
    • HOGWARTS LEGACY
    • HIGH ON LIFE
    • ANIMAL CROSSING: NEW HORIZONS
  • ENTERTAINMENT
    • RECAPS
    • NET WORTH
    • RICHEST WRESTLERS
    • RICHEST RAPPERS
    • RICHEST FOOTBALLERS
    • RICHEST VIDEO GAME COMPANIES
    • RICHEST PRO GAMERS
  • PRODUCTS
    • GAMING GEAR
    • LAPTOPS
    • HOUSEHOLD
    • ELECTRONICS
    • GIFTS
    • TRAVEL GADGETS
    • SERVICES
  • FOOD
  • TRAVEL
  • CRYPTO | NFT

Marion Forks Tunnel Nero Checkpoint: Days Gone Walkthrough

Last updated on October 3, 2020 by Alvin L

Marion Forks Tunnel NERO Checkpoint is one of the side missions in Days Gone.

Your task is to restart the generator at the checkpoint and find the NERO injector.

Here’s a walkthrough of Marion Forks Tunnel NERO Checkpoint in Days Gone.


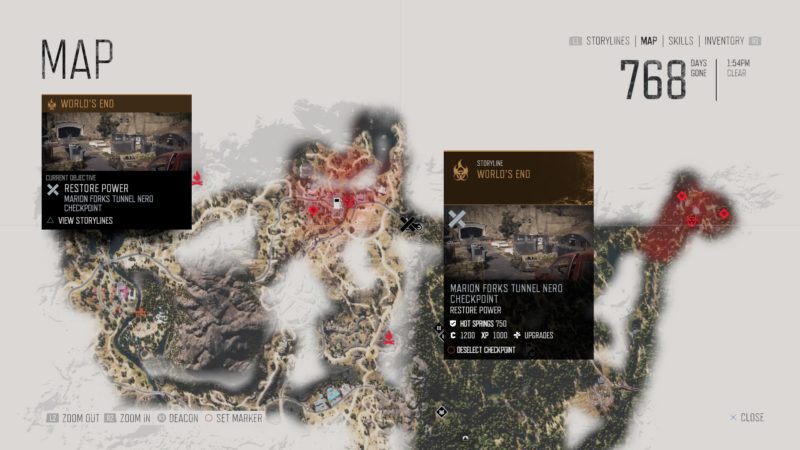
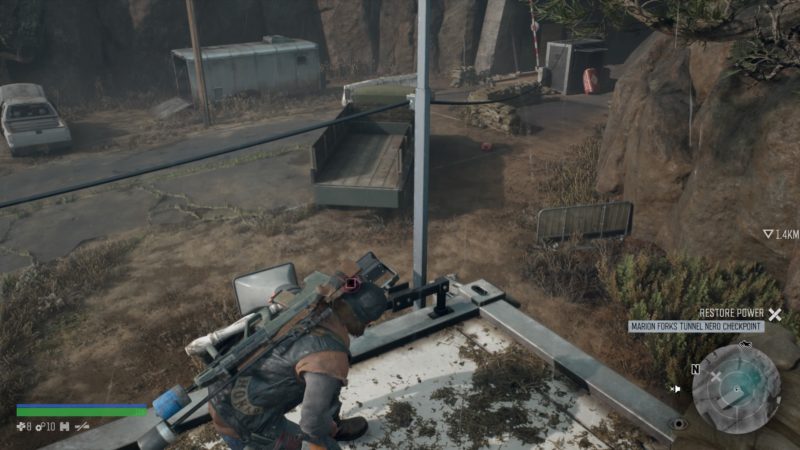
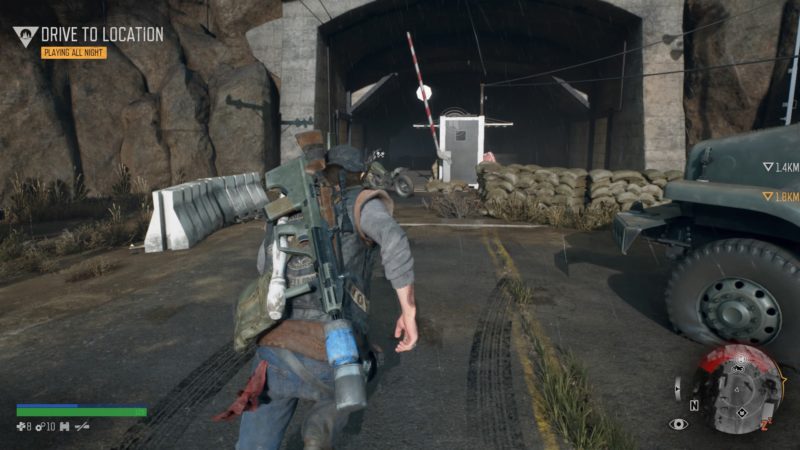
Get to the checkpoint

Your first task is to reach the checkpoint. The location is shown in the map below.

days-gone-marion-forks-tunnel-nero-checkpoint

You’ll probably have to go through a tunnel to reach this area.


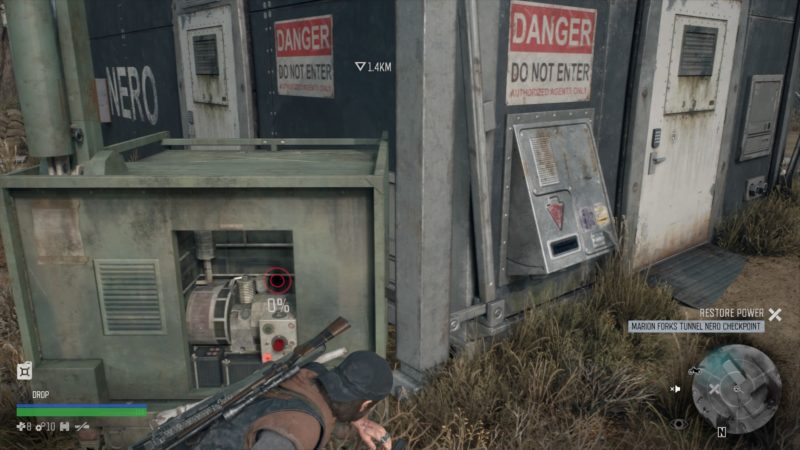
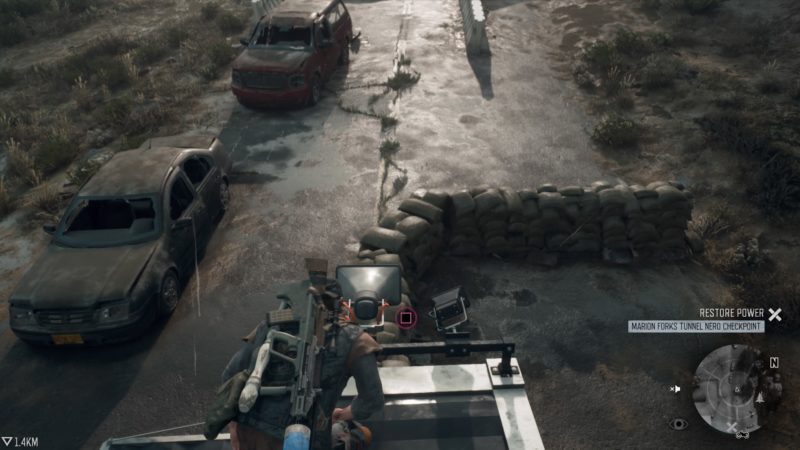
Refuel the generator

Look for the fuel canister first. It’s on the back of a truck.

days-gone-marion-forks-tunnel-nero-checkpoint-guide

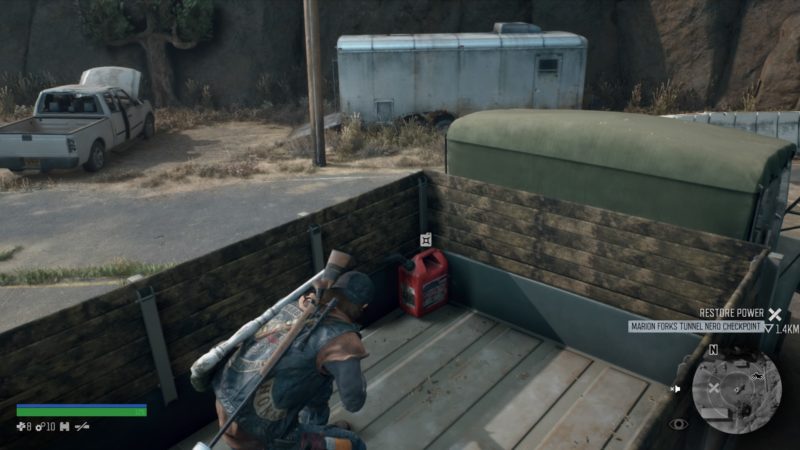
Grab the fuel can and go to the generator. Refuel it like you do with other checkpoints.

days-gone-marion-forks-tunnel-nero-checkpoint-guide-and-tips


Disable alarms / loudspeakers

There are four loudspeakers in this checkpoint. I actually missed one myself, which led to freakers coming.

Two of the speakers are above the NERO building.

days-gone-marion-forks-tunnel-nero-checkpoint-how-to-start-generator

days-gone-marion-forks-tunnel-nero-checkpoint-disable-alarm

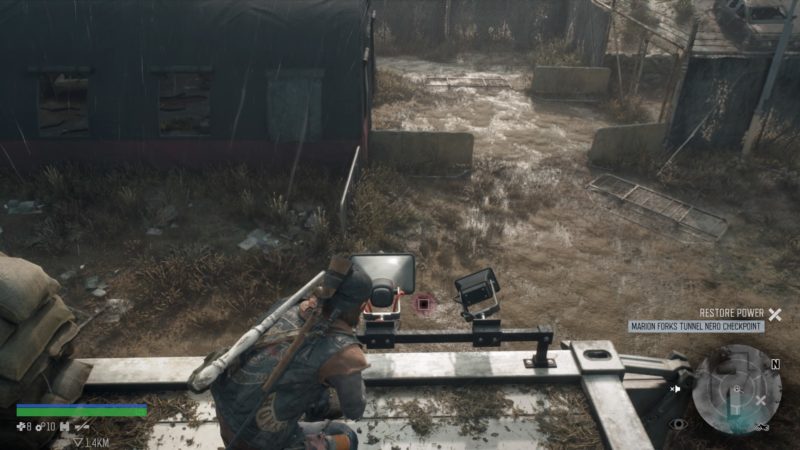
The third speaker is on the guardhouse just nearby the building, on the opposite direction of the tunnel.

days-gone-marion-forks-tunnel-nero-checkpoint-where-is-the-wire

The last speaker is also on a guardhouse, but this one is facing the tunnel. I missed this one completely.
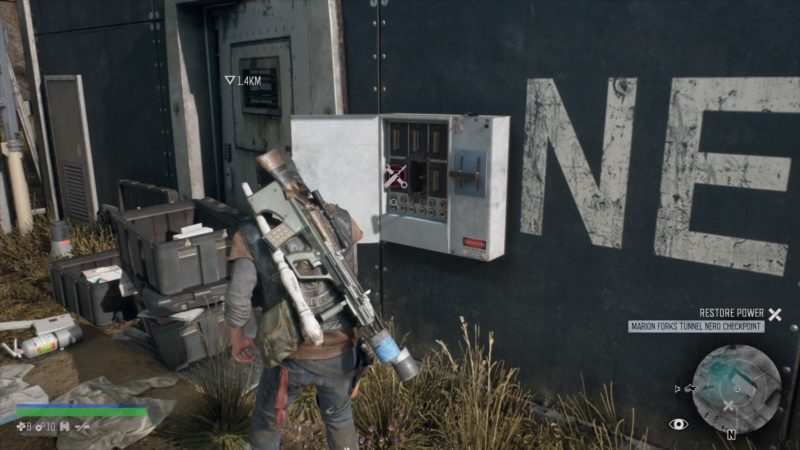
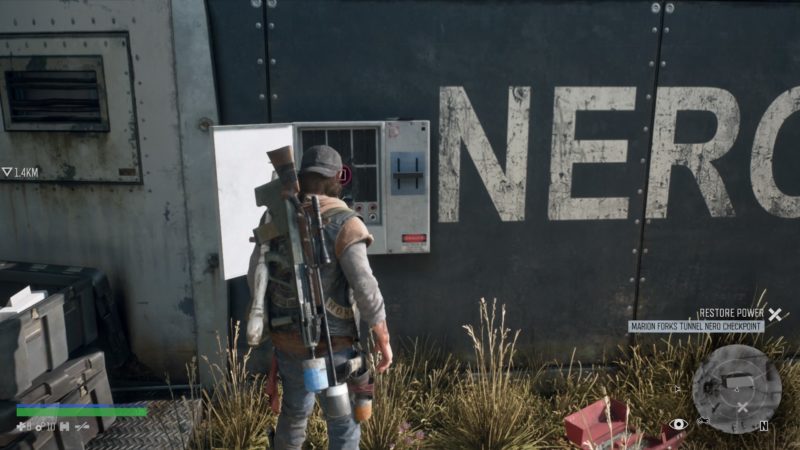
days-gone-marion-forks-tunnel-nero-checkpoint-wiki-and-walkthrough-tips


Repair the fuse

After disabling the loudspeakers, you still need to repair the fuse.
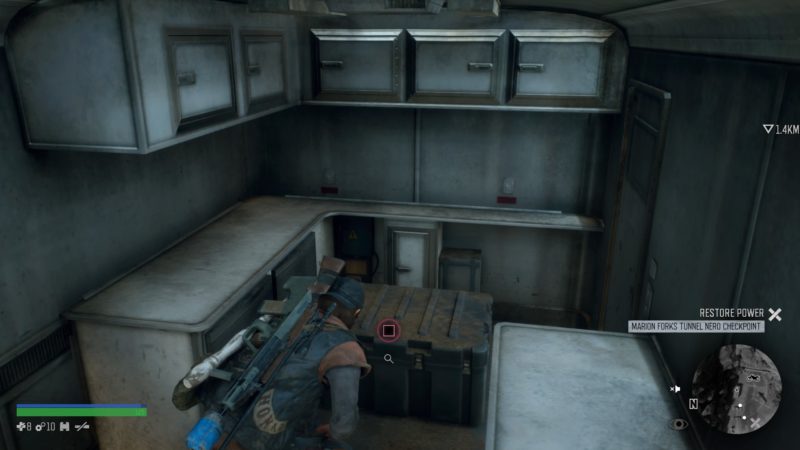
days-gone-marion-forks-tunnel-nero-checkpoint-wiki


Grab the cable

In order to find the cable, get inside the huge tent. Interact with the clue on the ground.

days-gone-marion-forks-tunnel-nero-checkpoint-wiki-and-guide

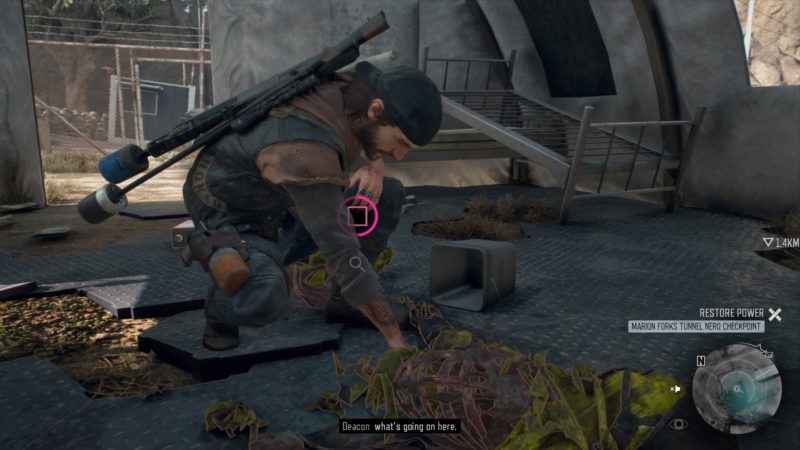
You’ll see footsteps. Follow the footsteps until you reach this place.

The cable is inside the box.

days-gone-marion-forks-tunnel-nero-checkpoint-tips


Repair the fuse

After getting the item, go back to the NERO building to repair the fuse.
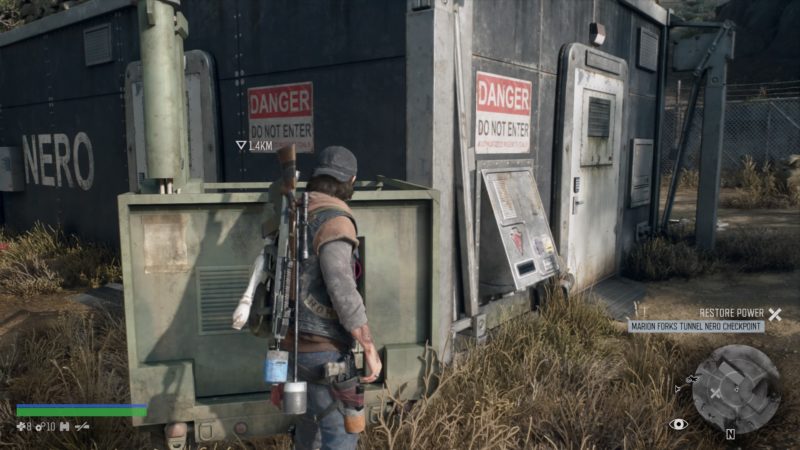
days-gone-marion-forks-tunnel-nero-checkpoint-mission-guide


Start the generator

Once everything’s done, start the generator to restore power to the NERO building. If all loudspeakers are disabled, it shouldn’t attract freakers.

days-gone-marion-forks-tunnel-nero-checkpoint-mission-guide-2

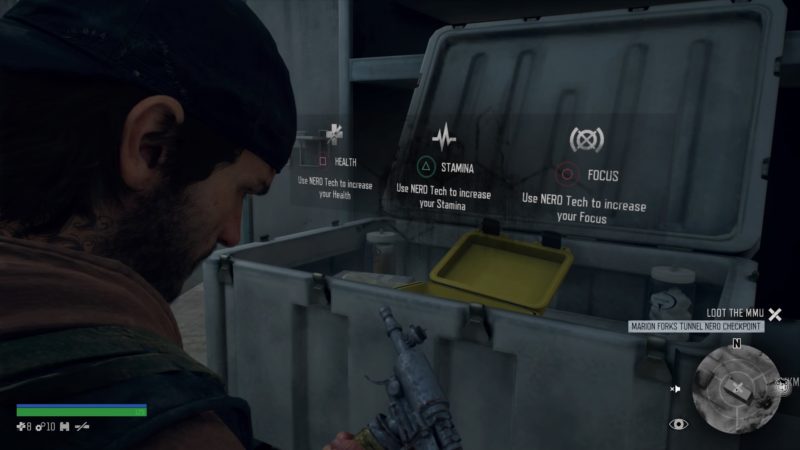
Inside the building, you’ll find this box with the injector. You can permanently increase one of your stats.

days-gone-marion-forks-tunnel-nero-checkpoint-walkthrough

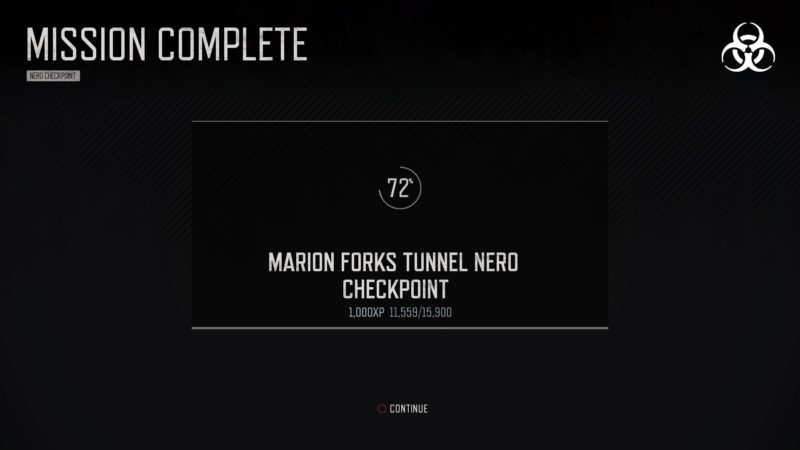
The mission completes here. You’ll get 1,000 XP for this mission. Most importantly, it becomes a fast travel point.

days-gone-marion-forks-tunnel-nero-checkpoint-walkthrough-guide


Related articles:

Drugged Outta His Mind: Days Gone Walkthrough

He Never Came Back: Days Gone Walkthrough

Hear About A Ripper Camp? – Days Gone Walkthrough

I Need Your Help: Days Gone Walkthrough

Sherman’s Camp Is Crawling: Days Gone Walkthrough

Filed Under: Days Gone, Gaming

About Alvin L

Alvin spends most of his time either absorbing content or creating content.

Primary Sidebar

Footer

Amazon Affiliate Disclaimer

Ordinary Reviews is a participant in the Amazon Services LLC Associates Program, an affiliate advertising program designed to provide a means for sites to earn advertising fees by advertising and linking to amazon.com.

Social Media

Facebook / LinkedIn / Pinterest / YouTube

Latest Posts

  • Hogwarts Legacy: The House Cup Walkthrough & Guide
  • Hogwarts Legacy: Summoner’s Court Match 5 Guide
  • Hogwarts Legacy: Harlow’s Last Stand Quest Walkthrough
  • Hogwarts Legacy: Weasley’s Watchful Eye Walkthrough
  • Hogwarts Legacy: In The Shadow Of Friendship Walkthrough
  • ABOUT
  • CONTACT US
  • PRIVACY POLICY
  • DISCLAIMER

Copyright © 2023 Ordinary Reviews · All Rights Reserved ·