• Skip to main content
  • Skip to secondary menu
  • Skip to primary sidebar
  • Skip to footer
  • HOME
  • NEED SOMETHING REVIEWED?

Ordinary Reviews

Gaming And Entertainment Site

  • GAMING
    • GAME GUIDES
    • UPCOMING RELEASES
    • SIMILAR GAMES
    • ANIMAL CROSSING: NEW HORIZONS
  • ENTERTAINMENT
    • RECAPS
    • NET WORTH
    • RICHEST WRESTLERS
    • RICHEST RAPPERS
    • RICHEST FOOTBALLERS
    • RICHEST VIDEO GAME COMPANIES
    • RICHEST PRO GAMERS
  • PRODUCTS
    • GAMING GEAR
    • LAPTOPS
    • HOUSEHOLD
    • ELECTRONICS
    • GIFTS
    • TRAVEL GADGETS
    • SERVICES
  • FOOD
  • TRAVEL
  • CRYPTO | NFT

Pillette Bridge Nero Checkpoint: Days Gone Wiki

Last updated on October 3, 2020 by Alvin Lau

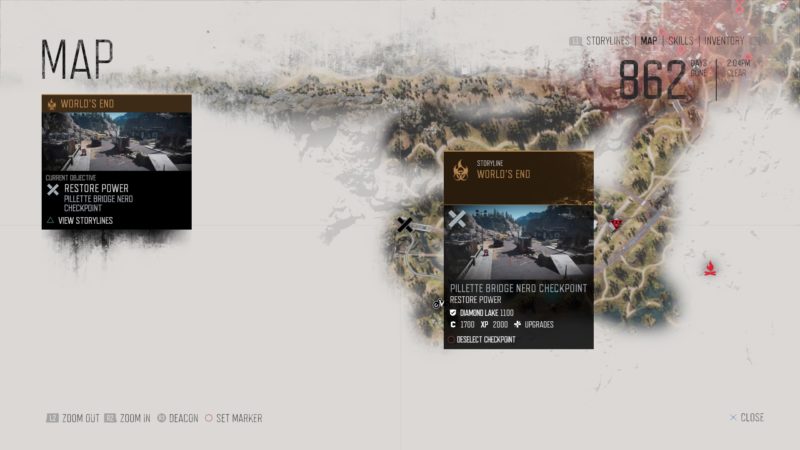
Pillette Bridge NERO Checkpoint is a mission in Days Gone under World’s End.

Your task is to restore power to the NERO Checkpoint and get the injector.

Here’s a walkthrough of Pillette Bridge NERO Checkpoint in Days Gone.


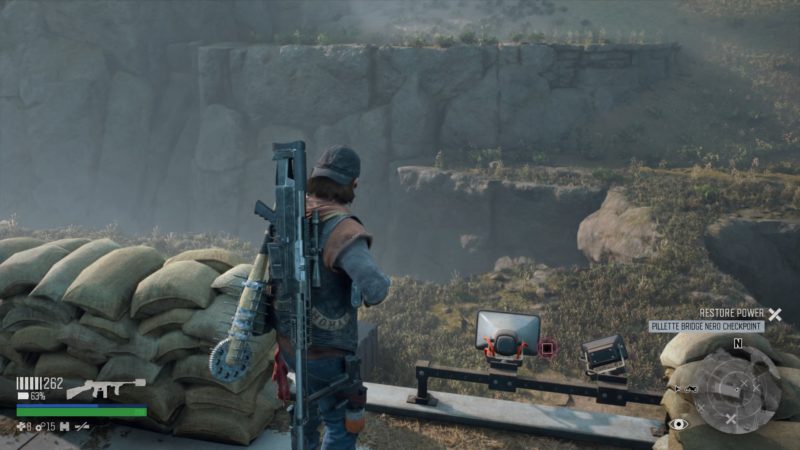
Get to the checkpoint

To begin the mission, ride to the checkpoint as shown in the map. It’s south of Wizard Island camp.

days-gone-pillette-bridge-nero-checkpoint


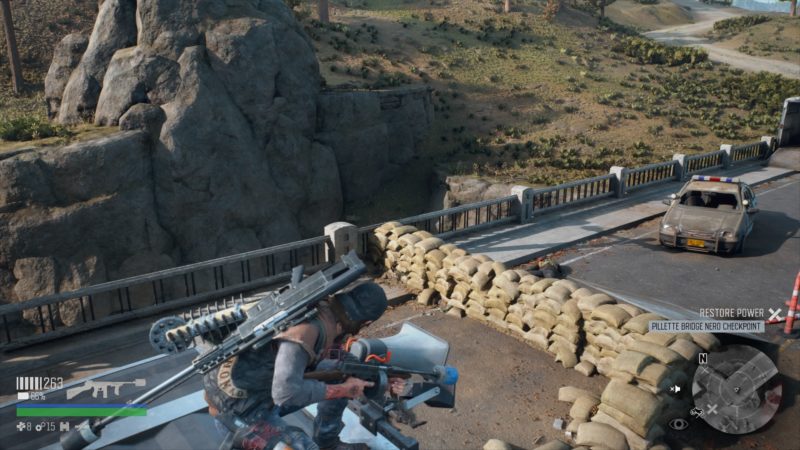
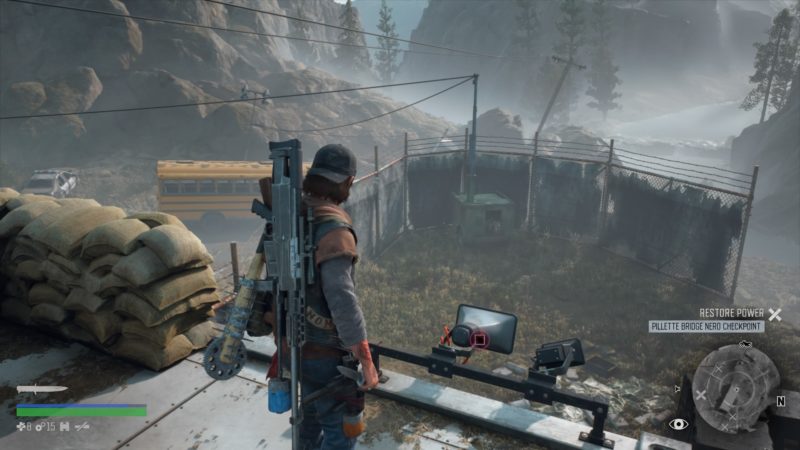
Disable the loudspeakers

There’s a horde nearby, so if you don’t wish to attract them, destroy all loudspeakers first.

There’s one speaker above the guard house.

days-gone-pillette-bridge-nero-checkpoint-guide

Also, watch out for the speakers on the lamp poles. Shoot at it to disable it.

days-gone-pillette-bridge-nero-checkpoint-guide-tips

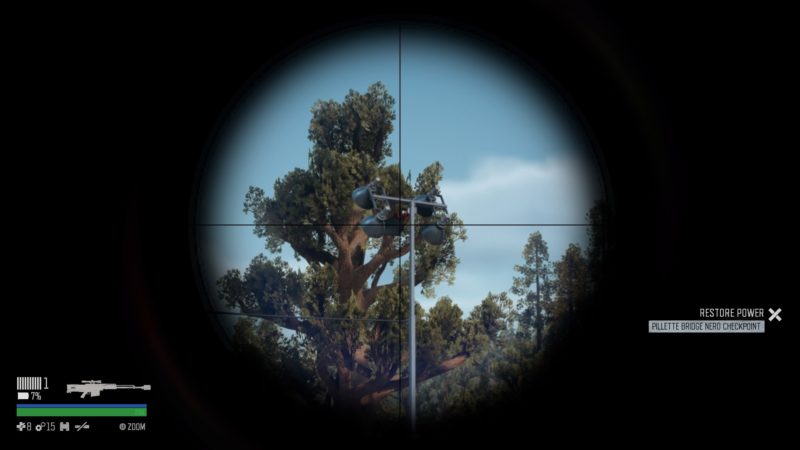
There are two speakers on the poles.

days-gone-pillette-bridge-nero-checkpoint-quest

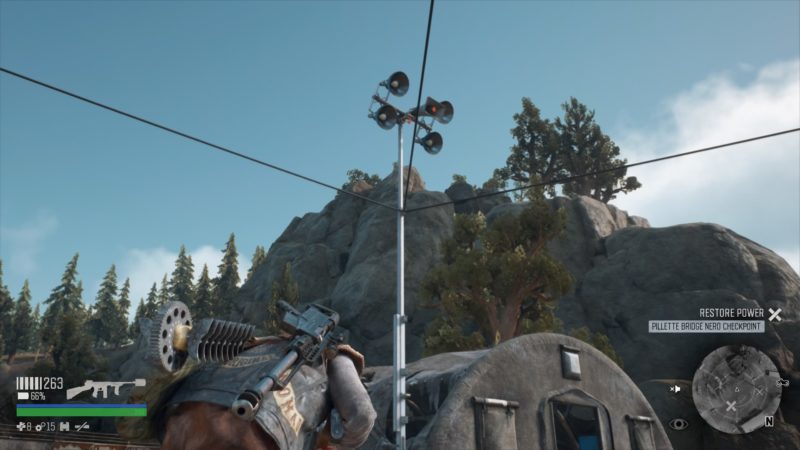
The remaining two speakers are on the NERO building itself.

days-gone-pillette-bridge-nero-checkpoint-mission

Disable both of them on both ends.

days-gone-pillette-bridge-nero-checkpoint-mission-guide


Grab the fuel can

Once the speakers are gone, grab the fuel can. One is near the guard house.

days-gone-pillette-bridge-nero-checkpoint-loudspeaker-location

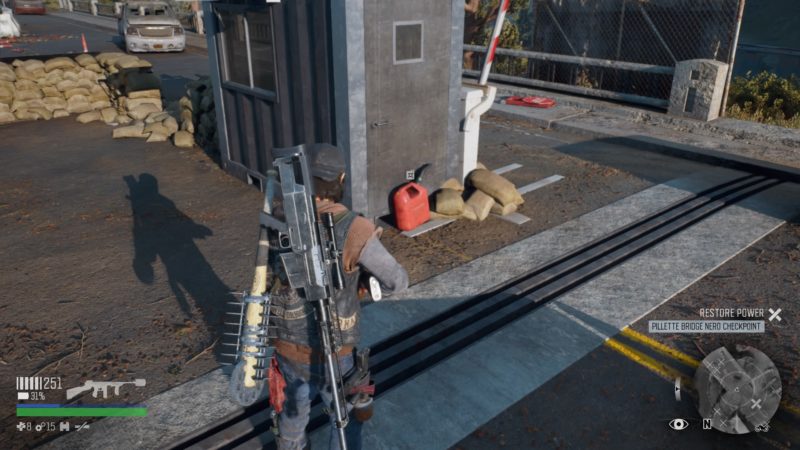
Refuel the generator. You can access the generator from the back.

days-gone-pillette-bridge-nero-checkpoint-walkthrough

Once it’s full, start the generator.


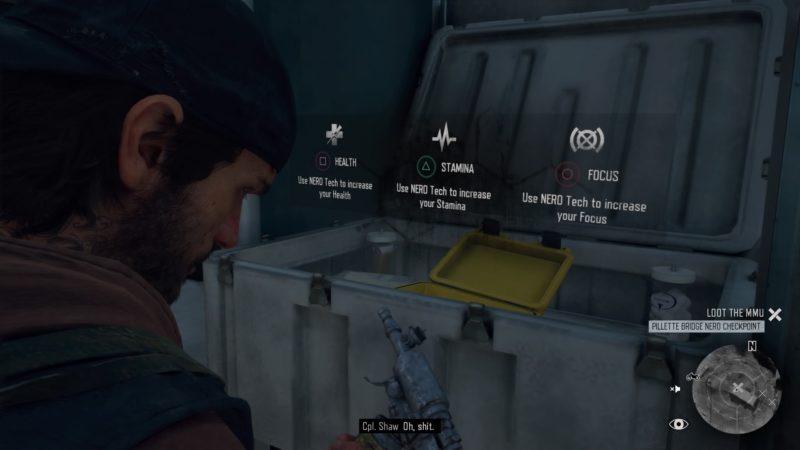
Grab the NERO injector

Enter the building and open this box to access the NERO injector.

You can choose any of the 3 stats to increase permanently. Stamina is a good one if you love dealing with hordes.

days-gone-pillette-bridge-nero-checkpoint-wiki

This mission completes here. You’ll get 2,000 XP for this.

days-gone-pillette-bridge-nero-checkpoint-tips


Related articles:

Iron Butte Pass Nero Checkpoint: Days Gone Walkthrough

Leave All That By The Door: Days Gone Walkthrough

Spruce Lake Nero Checkpoint: Days Gone Walkthrough

Dyson Pure Cool DP04 Review: Is It Worth Buying?

We Will Take Back This World: Days Gone Walkthrough

Days Gone: How To Get The Best Weapons In The Game

For An Outlaw Biker: Days Gone Walkthrough

Filed Under: Days Gone, Gaming

About Alvin Lau

Alvin spends most of his time either absorbing content or creating content.

Primary Sidebar

Footer

Amazon Affiliate Disclaimer

Ordinary Reviews is a participant in the Amazon Services LLC Associates Program, an affiliate advertising program designed to provide a means for sites to earn advertising fees by advertising and linking to amazon.com.

Social Media

Facebook / LinkedIn / Pinterest / YouTube

Latest Posts

  • Raft: How To Get The Master Key And Defeat The Alpha Hyena
  • Raft: How To Get The Cogwheel For The Elevator (Puzzle Guide)
  • Raft: How To Get The Hammer In Utopia
  • Raft: How To Get Two Entrance Keys In Utopia (Location)
  • Raft: How To Get Carbon Dioxide Canister And Harpoon
  • ABOUT
  • CONTACT US
  • PRIVACY POLICY
  • DISCLAIMER

Copyright © 2022 Ordinary Reviews · All Rights Reserved ·